


Before you start
Please download the suggested API integration process flow document and use it as a reference when developing.
Kindly adhere to the Netcash brand guidelines when developing.
Programmers Guide
Refer to our Programmers guide for more detail on how to apply the required methodology in this document.
Ensure that the settings for developers are adhered to before you proceed with your implementation.
Web Service Methods
The list of Netcash web service methods can be found here.
Quick Start Guides
Quick Start Guides will help you understand this service and get you started.
Overview
This document will describe how a Point of Sale system can build a QR code that can be read by all the Netcash-supported wallets and banking apps. Scan the example below with your own QR app to experience the Point of Sale solution.
Use the Netcash Point of Sale QR solution if you would like to generate QR codes on the fly without having to pre-register any data with Netcash upfront.
Supported apps and wallets:
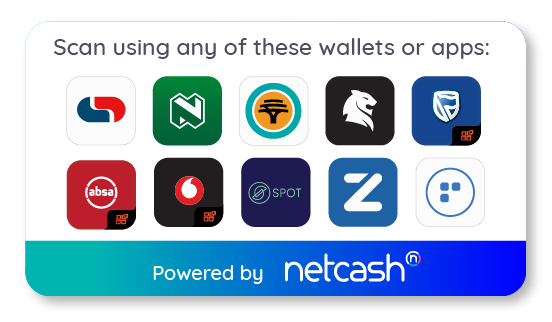
Tip: Hyperlink this image to always display the latest available payment options to your users without updating the code.
<img src="https://netcash.co.za/images/netcash-scan-to-pay-options.png" alt="Scan with any of these QR applications to make payment" width="90%" />
As more mobile wallet applications are added additional coding will not be required should you implement this suggestion.
Input
The base input is a URL as follows https://paynow.netcash.co.za/Site/PayNowQR.aspx
Thereafter you append the following parameters.
| Name | Description | Required |
| MerchantToken | Merchant token (GUID) from the Pay Now service in the Netcash account. | |
| M2 | Software Vendor Key (SVK). The key issued by Netcash to identify the software origin of transactions. (only used by Netcash ISV‘s else use the default value: 24ade73c-98cf-47b3-99be-cc7b867b3080) |
|
| Amount | The amount of the invoice | |
| P2 | Unique reference for this invoice | |
| Extra1 | Extra data field 1* | |
| Extra2 | Extra data field 2 | |
| Extra3 | Extra data field 3 |
* When using the Netcash Scan to Pay in a cash register enabled environment, use Extra 1 to define thepaypoint. The Extra 1 data is returned in the Netcash statement for purposes.
Method
Using the variables above; you will need to form a URL like the example below in your POS application:
https://paynow.netcash.co.za/Site/PayNowQR.aspx?MerchantToken=MGUID&P2=UniqueREF&Amount=1000.00&M2=SVKGUID&Extra1=SomeStuff1&Extra2=SomeStuff2&Extra3=SomeStuff3
Once complete, use a QR generator to generate a QR code and print/display this to the customer to read with any one of the Netcash supported wallet apps. The URL will require the mandatory fields for it to be accepted once the wallet/apps scans the QR.
Example

Failsafe
It is also possible to print an offline (static) code in case there is a connectivity issue. The offline code looks the same as the line above with only the MerchantToken field and no other fields.
https://paynow.netcash.co.za/Site/PayNowQR.aspx?MerchantToken=MGUID
The reason this is good practice is; if bi-directional connectivity is down, the Netcash system would not be able to return the message to the POS system. In this case you could write the offline code to the slip which will then return the message to an email and/or a mobile SMS number and still allow the transaction to take place. One could also keep sending the full code and look up the response via the mobile app or the Netcash website in the statement as an alternative solution.
Example
Notification
Notification of transactions will be sent via email and/or SMS as per the Token setup.
Upfront Request
Pay Now also allows a vendor to request payment directly from a device, by sending an SMS/eMail to the client. This means that for instance when delivering goods, the POS system can generate a payment request to the client and receive instant feedback of payment status.
Refer to the Payment request API.
Notify page
Once payment has been completed the Notify data is returned to the Notify URL. It is best practice to use the Notify data to indicate payment status on your system as it caters for all payment methods be they real-time or delayed ( Bank EFT and Retail payments).Accept and Decline URL’s do not cater for delayed transactions and contain less detail.
This URL is called for all transactions asynchronously whereas Accept and Decline URL’s should be used to synchronously to update the payer on the status of the transaction
There is also a retry plan built into the Notify URL allowing to retry a number of times before it being noted as not received.
Notify URL
| Field No: | Field Name: | Alpha / Numeric / Boolean | Description: |
| 1 | TransactionAccepted | B | “true” means the transaction was successful |
| 2 | CardHolderIpAddr | AN | This is the original IP the request was made from |
| 4 | Reference | AN | This is the unique reference that you sent Netcash in the original request |
| 5 | Extra1 | AN | This is the extra field you sent up in the request that we return for you to integrate into your own system. |
| 6 | Extra2 | AN | This is the extra field you sent up in the request that we return for you to integrate into your own system. |
| 7 | Extra3 | AN | This is the extra field you sent up in the request that we return for you to integrate into your own system. |
| 8 | Amount | N | This is the amount that you sent Netcash in the original request |
Unpaid reason codes
Click here for a complete list of unpaid reason codes
Additional resources
Read more on how to Print QR Code in C#.
Netcash brand guidelines
Please refer to the Netcash brand guidelines here when using any logos, images, icons, labels, descriptions, and references to Netcash in your software.
Testing
See Testing section for more details. If you require any integration assistance contact our technical support team